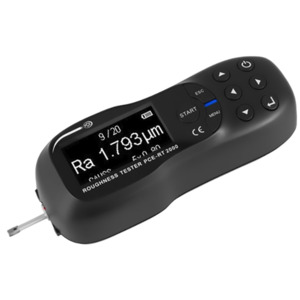
- Description
- Specifications
- Documents
- Roughness parameters: Ra, Rq, Rsm, Rsk, Rz, Rt, Rp, Rv, Rc
- Measuring ranges: Ra, Rq, Rc: 0.005 μm -16 μm / Rz, Rt, Rp, Rv: 0.02 μm - 200 μm / Rsm: 5 μm - 1000 μm / Rsk: -1 - 1
- Probe: Diamond, 90° angled
- Numerical and graphical display of measured values
- Micro-USB interface for data transmission to a PC
- 3 different cutoff wavelengths
- Inductive measuring principle
- Probe tip radius: 5 µm
- Statistical functions
- Standards: ANSIB46.1/ASMEB46.1 (DIN EN ISO 4287)
The PCE-RT 2000 Roughness tester is used for accurate measurement of surface roughness. The roughness tester can be used on all surfaces. The roughness with the roughness measuring device is precisely recorded via the piezo sensor. The roughness tester measures in the ranges Ra, Rq, Rsm, Rsk, Rz, Rt, Rp, Rv, Rc and is therefore a universal roughness tester in quality assurance.
The roughness tester is simply placed on the surface for measurement. During the measurement process, a probe is pulled over the surface and the roughness tester displays the measured value on the large, OLED display. In addition to the numerical measured value display, the measuring profile can be graphically visualized. The roughness tester is powered by a rechargeable battery. The charger of the surface tester is included in delivery. The roughness tester has an automatic shut-off function for the battery care.
The roughness tester has a Micro USB cable. The measuring device can be charged via this connection. Furthermore, the measurement data can be transmitted from the roughness tester to the software. So it is possible to create a complete documentation of the measurement.
Rz = average roughness depth
The average roughness depth Rz is the arithmetic mean of the largest single-order depths of several adjacent individual measurement sections.
Ra = arithmetic mean roughness
Ra is the generally recognized and internationally applied roughness parameter. It is the arithmetic mean of the absolute values of the profile deviations within the reference distance. The measured value Ra is always smaller than the Rz value determined on the same roughness profile.
Rt = maximum surface roughness
The maximum surface roughness Rt is the distance between the highest and the lowest point of the measuring section.
Rq = square mean roughness
Rq is the root mean square of all ordinate values within the individual measurement distance l. Rq corresponds to the designation RMS (Root Mean Square).
What's in the Box
- 1x Roughness Tester PCE-RT 2000
- 1x Micro-probe
- 1x Protective cap for buttons
- 1x Clamping device
- 1x Software
- 1x Calibration plate
- 1x Roughness standard
- 1x USB cable
- 1x Charging adapter
- 1x Transport case
- 1x Instruction manual
